AdheScan

Adhesive failure surface inspection system

AdheScan
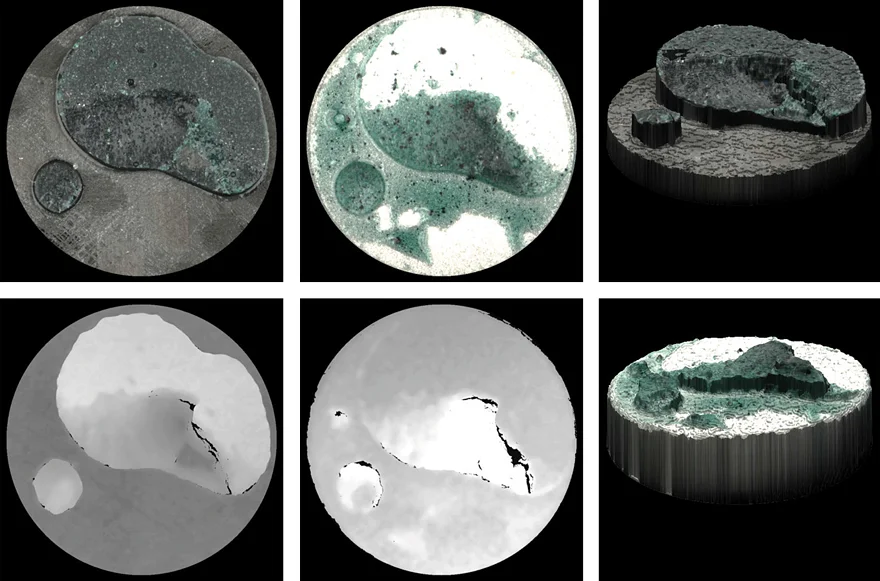
AdheScan 3D image
High-resolution images, height information, corresponding rotatable 3D images.
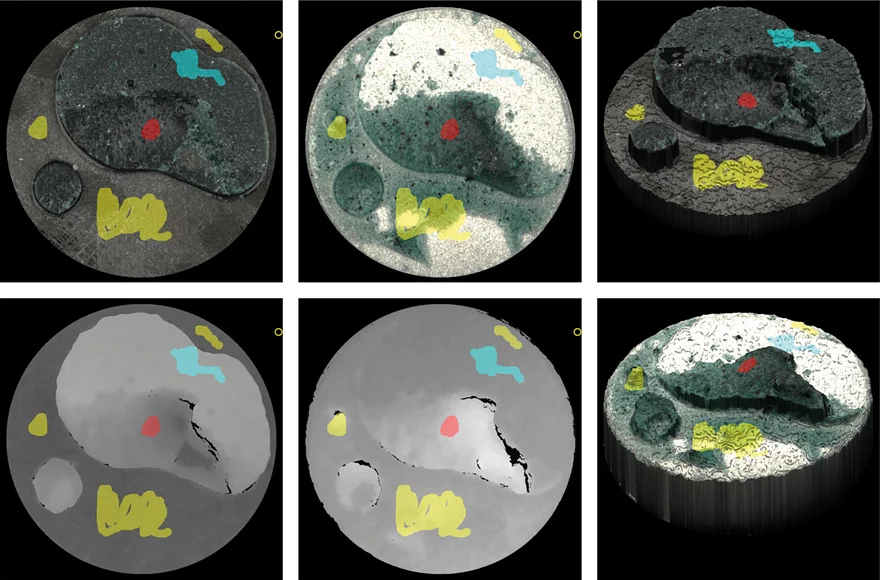
AdheScan Annotation Assistant
Annotation Assistant: Easy fracture class marking
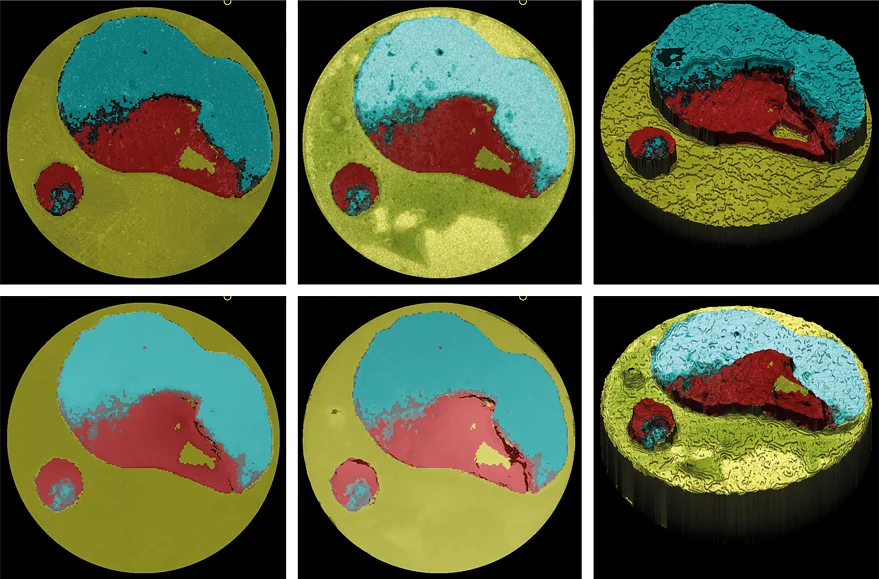
AdheScan Quantifiable results
Only few markers lead to results for the whole image.
New at Schäfter+Kirchhoff
Machine<br>LearningMachine
Learning

Features

The AdheScan is an advanced, user-friendly comprehensive measurement system for the quantifiable, reliable and reproducible inspection of adhesive failure surface patterns. The system is designed to utilize expert knowledge in an objective and reproducible way. Bond Experts profit from ease of use as well as specially designed image acquisition in combination with trainable machine-learning algorithms (included in SKan-AD software)


Ease of use: Intuitive routines, high resolution, 3D height information and 3D view of each fracture pair; scans of up to 8 fracture pairs in one scan
Quantifiable results: Quantifiable, reproducible results for adhesive fracture surface patterns. All results are logged and all relevant data is stored in a database for easy retrieval of previous results
Comprehensive view: Both fracture partners are aligned using the alignment tool and then evaluated together for increased accuracy
Annotation assistant: Bond Experts annotate the sample simultaneously in all 6 views, wherever a pattern is easiest to identify
Advanced algorithms: Machine-learning algorithm for quick and easy sample analysis

  • High-resolution image (11 µm/pixel, 2302 dpi) of up to 8 fracture pairs
  • 3D height information with 20 µm resolution
  • Annotation assistant with Pair of Assignment: Labeling of the sample is performed in parallel in both the height and high-resolution images and is displayed simultaneously in the 3D image - wherever a pattern is easiest to identify
  • Complete inspection in less than 2 minutes
  • Semi-automatic mode and process mode. Prediction mode for dealing with very frequently changing substrate/adhesive samples
  • All results are logged and all relevant data is stored in a database for easy retrieval of previous results. A pdf file is created automatically containing all relevant information
Description

Adhescan is a further development of a demonstrator, that was developed in cooperation with Fraunhofer IFAM (Department of Adhesion and Interface Research & Quality Assurance and Cyber-Physical Systems) in a project (SAMBA, 20Q1924A) publicly funded by the German Federal Ministry for Economic Affairs and Climate Action (BMWK). The customization for this particular application and the implementation of the machine learning algorithm were made possible through close collaboration and knowledge sharing. The patent is pending (not yet published).


Benefits for Bond Experts
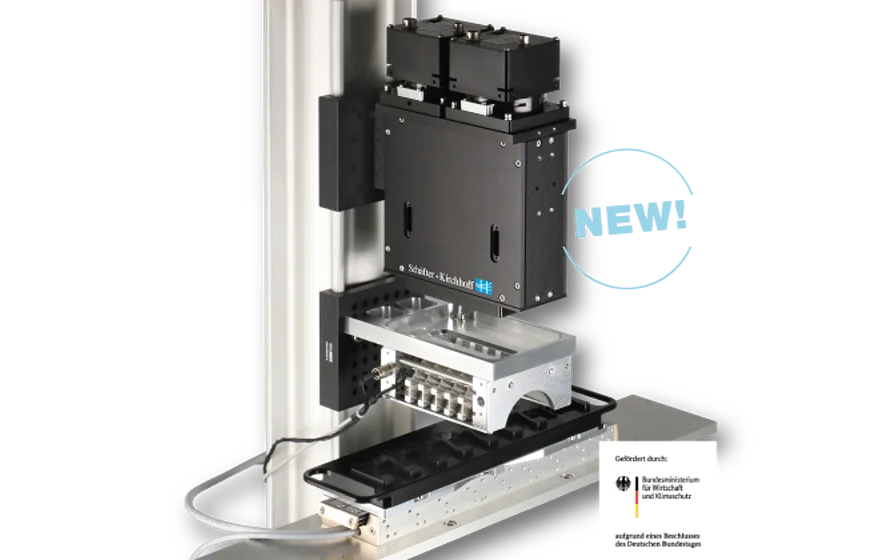
AdheScan provides reproducible, quantifiable results for common adhesive failure patterns. It utilizes two line scan cameras by Schäfter+Kirchhoff (type SK4k-U3DR7C, color, pixel size 7 µm) and provides a high-resolution image (11 µm optical resolution) of both surfaces of the fracture pairs. The cameras are used in a stereo configuration to provide additional valuable height information with a resolution of 20 µm. Combining the images with the height information, a 3D representation of the sample is generated. The standard system scans up to 8 adhesive failure pairs (8 pairs of substrate and stamp) less than 45 seconds and calculates the height information in approximately 20 seconds. It is also possible to scan different types of samples with the help of a specially adapted sample holder. The high-resolution image and the height information are the basis for the subsequent evaluation using a machine learning algorithm. The software allows the user to easily train the machine learning algorithm to automatically evaluate samples in seconds. A well-trained algorithm has a processing time of only about 4 seconds for the evaluation of 1 pair of samples, depending on the computer hardware.


Software SKan-AD: Surface Failure Inspection using the AdheScan
The normal procedure for evaluating a set of samples with AdheScan software includes several routines inspired by practical experience, e.g. a previously defined ROI set and the input of meta information such as the adhesive used and the substrate materials

1. Image acquisition: 2x2 view with the two high-resolution images of the two fracture pairs and the corresponding display of the height information. 

2. Comprehensive view: Overlay visualization for the alignment of both fracture partners. Enhanced accuracy because all 4 images (high-resolution and height image) must be considered and evaluated together. 

3. 3D image: High-resolution images of both substrate and the stamp, height information for both substrate and stamp as well as the corresponding rotatable 3D images of both substrate and stamp. 

4. Annotating assistant with pair of assignment: The user marks the fracture classes where the fracture pattern is easiest to identify in either the high-resolution or height image . All other images are marked live for more accurate results.

5. Quantifiable results: Even with only a few markers, the implemented algorithm can make a prediction for the entire image. The complete image is now divided into the corresponding fracture patterns according to the predefined labels, e.g. 25% CF, 35% AF and 40% customized failure type.


AdheScan 3D image
High-resolution images, height information, corresponding rotatable 3D images.
AdheScan Annotation Assistant
Annotation Assistant: Easy fracture class marking
AdheScan Quantifiable results
Only few markers lead to results for the whole image.

Technical data

AdheScan

Sensor Head
Line Sensor
2 x 4096 pixels
 
type SK4k-U3DR7C, color, pixel size 7 μm
Optical Resolution
11 µm / pixel, 1302 dpi
Height Resolution
20µm
Features
White Balance / Shading Correction, LUT
Illumination
Integrated white LED illumination
Software
SKan-AD included

Order options

Order codeColorPixelsResolutionHeight ResolutionIllumination
SK-SSM-C-1000x2 x 4096 pixels11 µm / pixel, 2302 dpi20µmWhite LED

Accessories

SKan-AD
Software for Surface Failure Inspection using the AdheScan